We’ll create a section on the site called “failure stories.” Working with epoxy is really difficult. Working with a 3D printer is even more difficult. Trying to work with both is pure torture. That’s why we have plenty of “failure stories.” But before we scare you too much, let’s start with a small one.
I sat down with a passion and started building chess sets constantly, but one day I realized I had huge chess sets all over my house. I have at least 5-6 30×30 chess sets. Should I stop? No, I can’t! So I had to do something different. But still, something with chess. I loved this work.
That’s when I thought of making a smaller, “folding” chess set. If it were a folding chess set, it would have to have backgammon inside. It’s a very popular product in Türkiye. It has a chess/checkerboard on the outside and a backgammon board on the inside. We wanted Turkey, so I wanted a product with the Turkish flag. It wasn’t just a random thing. Let me add a little twist. I sat down in front of the 3D design program. I measured, cut, and spent days working on it.
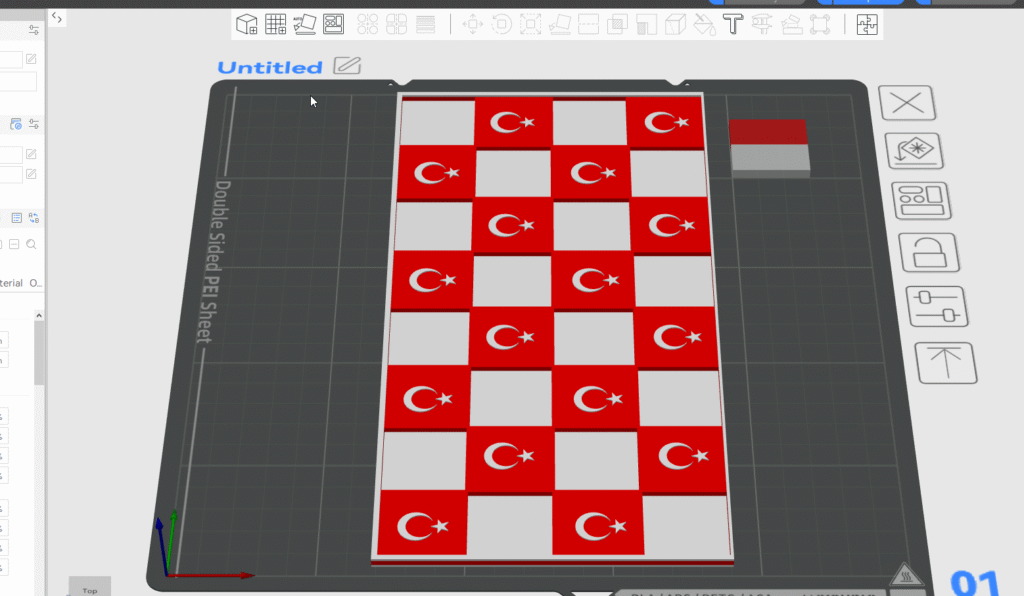
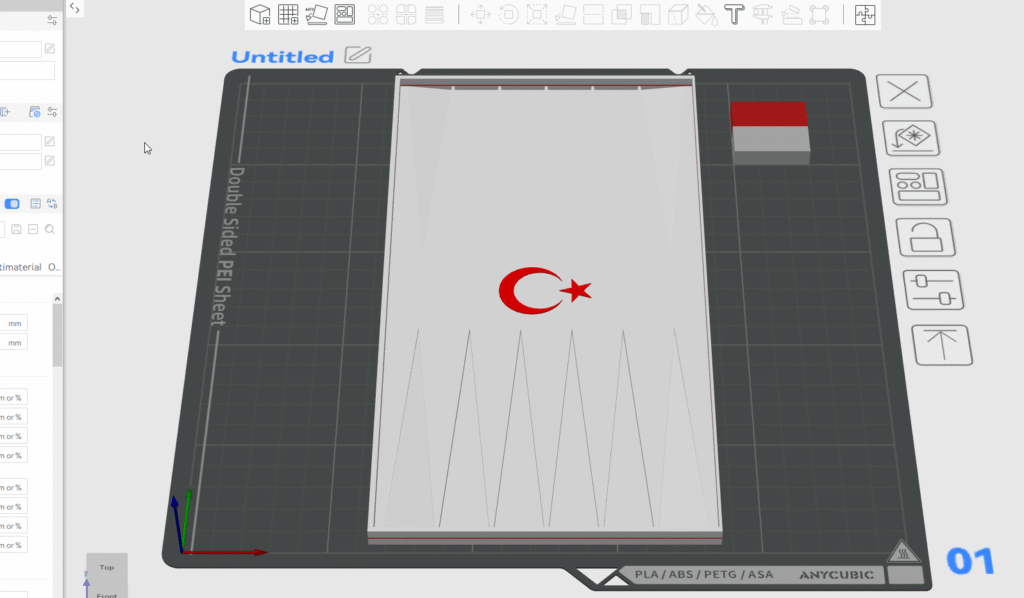
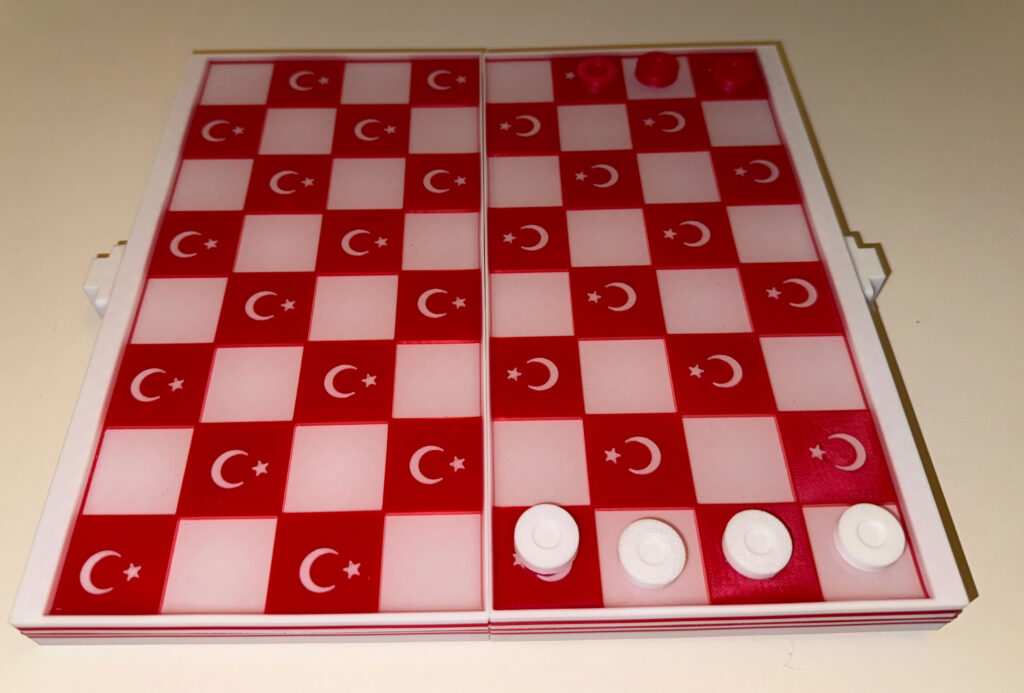
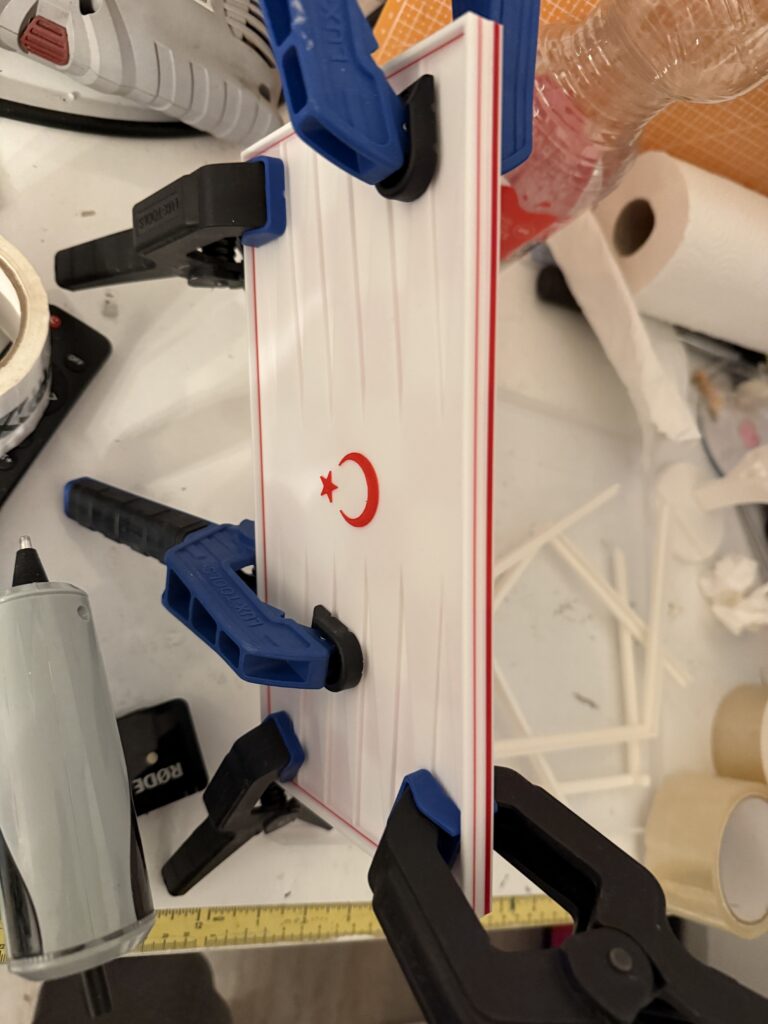
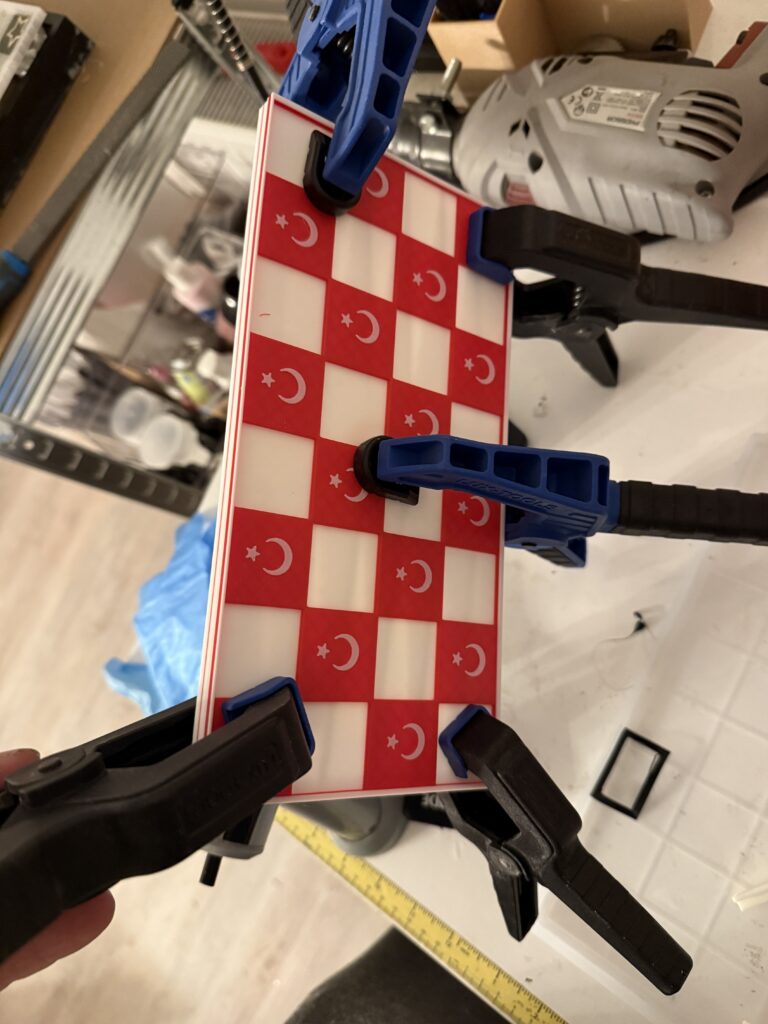
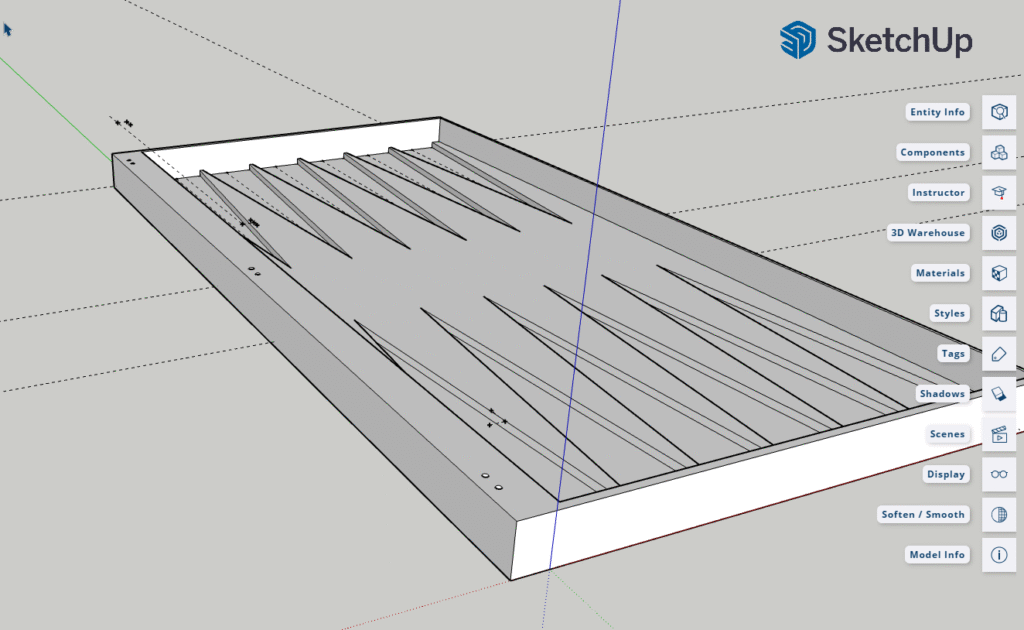
I designed a 240×240 box. This way, I could have printed it in one go. However, since both the backgammon and chess sides would have patterns, I had to print them in two batches. I didn’t want any of the surfaces to be exposed on the bottom of the printer. It’s best not to compromise on quality. I printed four pieces in total, placing them two by two. It took about six hours. And I glued the pieces together, making one side the chess piece and the other the backgammon piece.
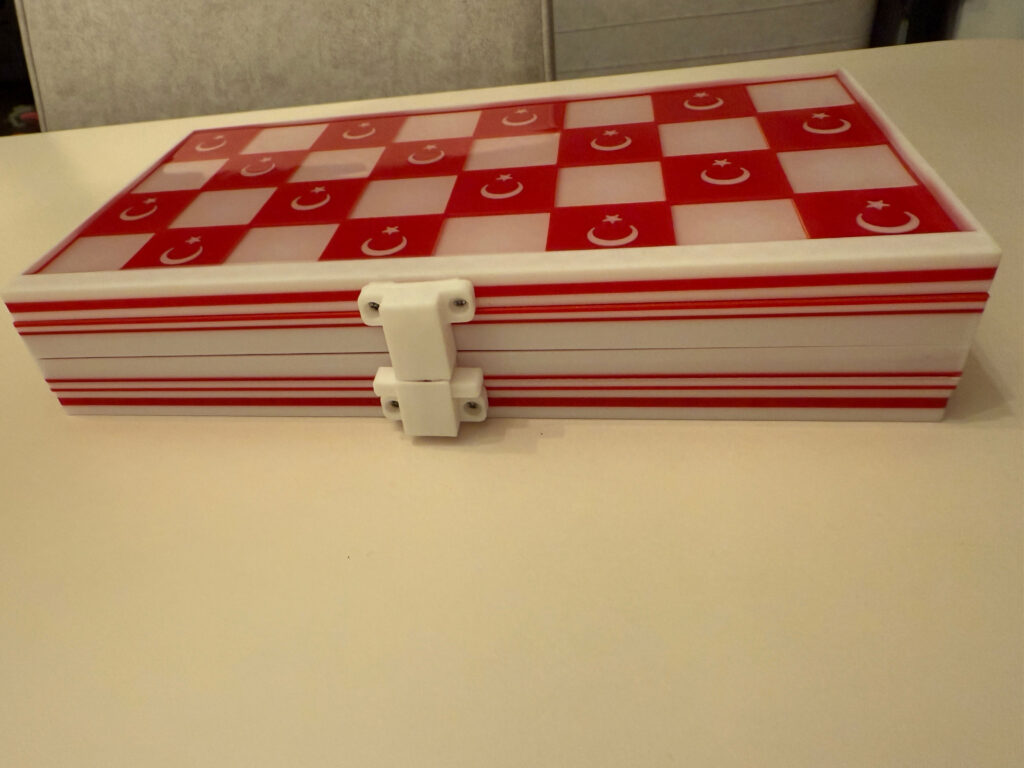
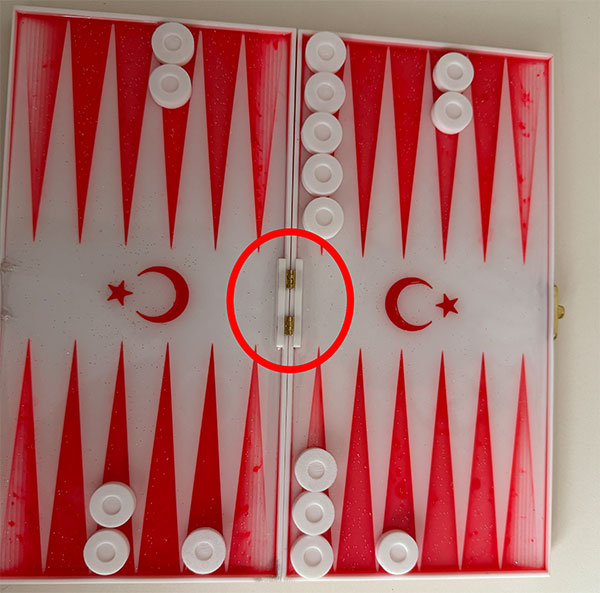
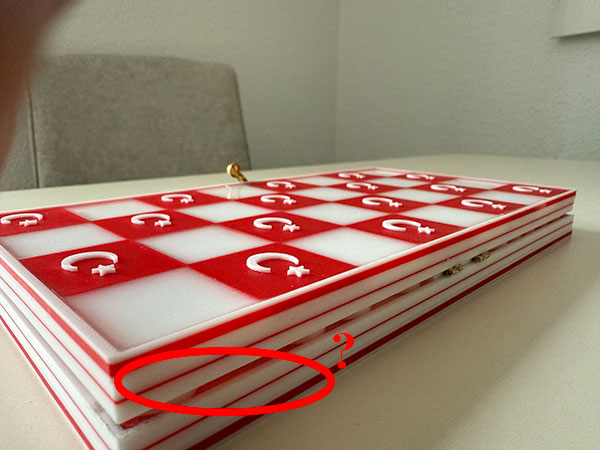
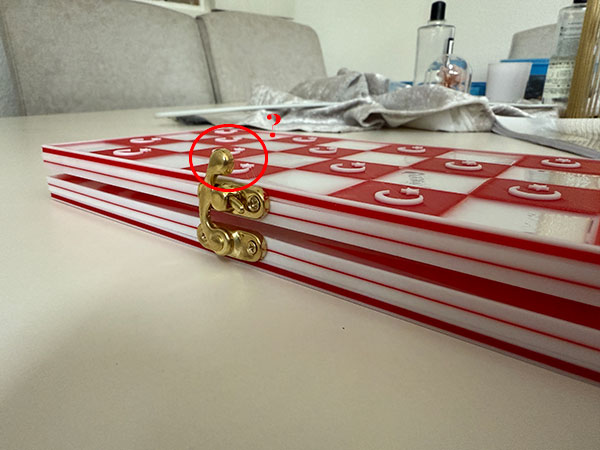
I have two beautiful pieces. Both have one side the chess piece and one side the backgammon piece. Perfect. Now it’s time to put these two pieces together. We need some hinges to join them. I bought the smallest hinges I could find. After assembly, I also need a locking mechanism to keep the opening closed. It shouldn’t open by itself all the time. I also bought the smallest locking mechanism I could find that works with the hinge. Let’s see how it all fits together. But where do I attach the hinges? My side is 2 mm thick. But I can’t attach them there. I also don’t have any screws small enough to attach them. A 2 mm screw would break them anyway. So I printed another small jig and inserted the hinges into it. I also glued them to my box. You can see this jig in the photo below.
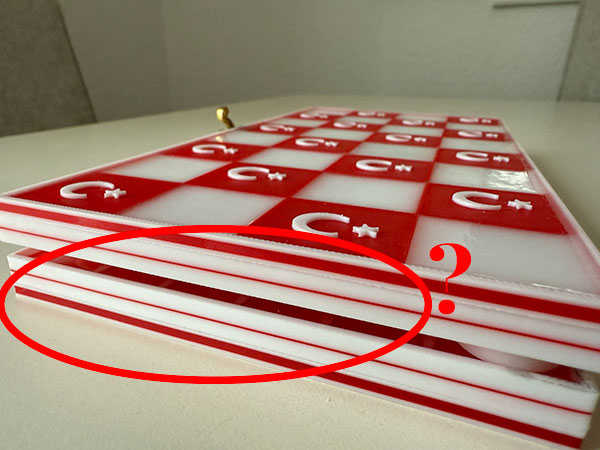
However, they needed to be a bit higher because I needed to have space to insert the hinges. This increased height prevented me from closing the box. This resulted in the image with the question mark below.
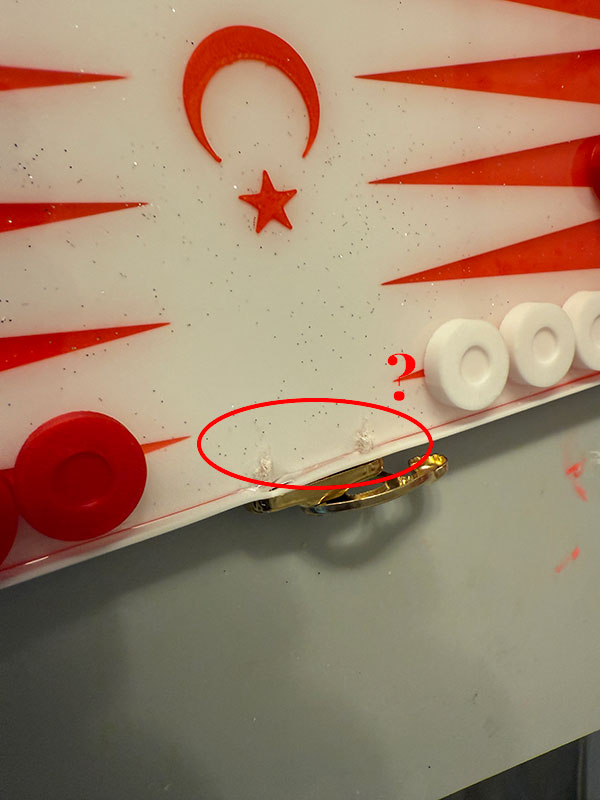
I decided to continue. I wanted to complete the project as is. It would have been helpful to have a product in hand and to see other problems. I decided to attach the lock I bought to the box. However, the lock mechanism remained exposed. This created both an unsightly appearance and a problem with positioning the box that way. But I had another problem. The screws I used to attach this lock mechanism were longer than 2 mm, so they penetrated my side walls and stuck into the game board. You can see it below.
Now this set was completely trash. Had all those days of work been wasted? No! I had actually gained the most valuable thing: experience. So I decided to create a new design. First of all, the 2mm edges were giving me a hard time. I needed at least 1cm of space for the hinges. So I had to widen the backgammon pieces by 10mm on one side, bringing the total size to 260mm. Naturally, the chess pieces had to be the same length. I widened them by 10mm on the other side. I determined the locations for the hinges. I reviewed all the calculations. And I completed the design.
Although I had a problem with the locking mechanism on my second design, I somehow solved it with a plastic piece I made myself. Other than a few mm of extra height when playing chess, the set is now completely fine. A failed project ultimately led to a successful product.